

Feeling a bit lost in a world of A2s and A3s while decorating your little one's nursery? You're not alone. Let's make it simple.
Think of UK poster sizes like children's clothing—A4 is a small t-shirt perfect for a little nook, A3 is a versatile jumper that fits just about anywhere, and A2 is a big, cosy coat for a stunning feature wall. Choosing the right one is the first step in turning four walls into a magical space for your baby to dream and grow.
Your Quick Guide to Nursery Poster Sizes
Picking out art for your child's room is about so much more than just filling an empty space. It's about creating a feeling of warmth, sparking their imagination, and wrapping them in comfort. The size of the poster you choose plays a huge part in setting that tone.
A large, bold print can become the imaginative centrepiece of a playroom, while a collection of smaller prints can tell a gentle story above a changing table or cot.
The good news? You don't need to be an interior designer to get it right. By understanding a few basic concepts, you can confidently select prints that feel perfectly balanced and intentional in your home. It all starts with the 'A-series'—the standard system used for paper and posters right across the UK.
Why A-Series Sizes Are a Parent's Best Friend
The A-series is incredibly practical for busy parents, and here are a few reasons why:
- Easy to Frame: Because these are standard UK sizes, finding ready-made frames is a breeze. You can easily pick up A4, A3, or A2 frames from most home stores without splashing out on expensive custom options. A real win for the budget!
- Create Cohesive Displays: The consistent proportions of A-series paper mean that different sizes naturally look good together. This makes creating a beautiful gallery wall much less intimidating! For more inspiration, check out our guide on stylish nursery wall art ideas.
- Predictable and Simple: Once you get a feel for the most common nursery sizes, you can plan your decor with confidence, knowing exactly how a print will look and feel in your space before you even buy it.
This system isn't new; it has a rich heritage. Standard poster sizes in the UK have been shaped by printing history dating back to the Victorian era. The iconic A-series became the norm after the British Standards Institution formalised them way back in 1944.
Today, the most popular size remains the A2 at 420 x 594 mm. It's perfectly suited for children's wall art, like our Superstar Football sets or Jungle Safari bundles. This size allows parents to create eye-catching gallery walls in nurseries without overwhelming smaller rooms.
Understanding the A-Series Paper System
Ever wondered what those ‘A’ numbers on posters and prints actually mean? It might sound a bit technical, but the logic behind the A-series paper system, which is the standard for all UK poster sizes, is wonderfully simple. Getting your head around it is the key to choosing art that feels just right in your home.
Think of it like this: start with a giant piece of paper called A0. When you fold this sheet perfectly in half along its longest side, you get two sheets of the next size down, A1. Take one of those A1 sheets, fold it in half, and you get two A2 sheets. This clever pattern continues all the way down the line.
Each size is exactly half of the one before it. This mathematical magic means that all the sizes share the same proportions, which is why an A4 print looks so harmonious next to an A2 print in a gallery wall. It’s a brilliant system that takes all the guesswork out of mixing and matching.
Giving Each Poster Size a Personality
To make it even easier to picture, let’s give each size a personality based on how it might fit into your little one’s space. Getting a feel for their character helps you decide which role each print will play in your nursery's story.
- A1 The Showstopper: This is the big one, the main event! An A1 print is perfect for making a bold statement on a large, empty wall in a playroom, instantly becoming the imaginative focal point.
- A2 The Centrepiece: As the most popular size for nursery art, A2 is a fantastic centrepiece. It has enough presence to hang proudly above a cot or changing table, anchoring the room's theme without being overwhelming.
- A3 The Versatile Friend: This is your go-to size for flexibility. An A3 print works beautifully on its own, in pairs, or as a key player in a growing gallery wall. It’s big enough to be noticed but small enough to fit almost anywhere.
- A4 The Quiet Storyteller: Familiar as standard letter paper, an A4 print is perfect for adding those lovely personal touches. Use it for name prints on a bookshelf, sweet illustrations by a bedside table, or as smaller supporting pieces in a larger art collection.
- A5 The Tiny Treasure: This little postcard-sized print is ideal for the smallest of spaces. Prop an A5 on a picture ledge, add it to a pinboard, or use it to fill a tiny gap in a gallery wall.
This simple clothing analogy really helps to visualise the scale of the most common UK poster sizes, from the large 'coat' (A2) down to the smaller 't-shirt' (A4).
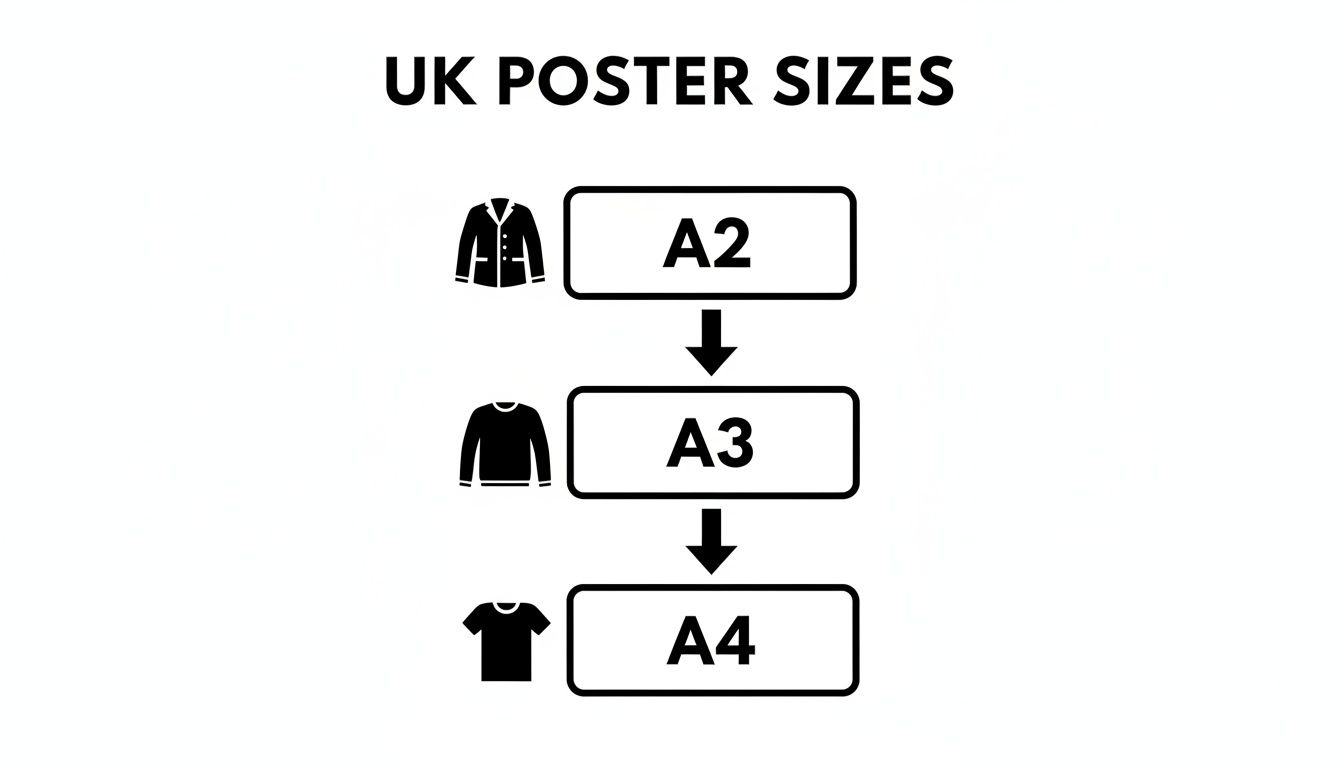
As you can see, each step down in size creates a distinctly different impact, helping you match the print perfectly to the scale of your room.
By understanding this simple folding logic, you can confidently mix and match A2, A3, and A4 prints, knowing their proportions are designed to complement each other beautifully. It's the secret to a professional-looking gallery wall!
Once you can picture how each size relates to the next, planning your nursery walls becomes a much more creative and enjoyable process. You'll move from wondering what size to get, to knowing exactly which combination will bring your vision to life.
For a detailed breakdown of all available dimensions, you can explore our complete Pompom Prints size chart to see every option.
How to Choose the Right Poster Size for Your Space
Now that you can tell an A2 from an A4, the real fun begins: picking the perfect print for your little one's room. Choosing the right UK poster sizes isn’t just about filling a blank wall. It’s about creating balance and making the space feel finished and full of magic. The good news is, you don’t need an interior design degree—just a few simple rules of thumb.
One of the best tricks in a designer's toolkit is the ‘two-thirds rule’. It’s a wonderfully simple way to make sure your art feels perfectly connected to the furniture below it.
The idea is that any artwork you hang above a piece of furniture—like a cot, a changing table, or a chest of drawers—should be roughly two-thirds the width of that furniture. A poster that's too small can look a bit lost and lonely, while one that's too big can feel heavy and overwhelming. Nailing this balance creates a pleasing visual anchor that just feels right.
Matching Poster Size to Wall Space
Every room has its own personality, and that includes its quirky corners and tricky walls. A tiny box room needs a completely different approach to a large, open-plan playroom. Let's walk through a few real-life scenarios to see how different UK poster sizes can bring out the best in your space.
-
For the big, empty wall: Got a large, feature wall in the playroom just begging for attention? This is the perfect canvas for a single, bold A1 poster. Its sheer size can create an incredible focal point, sparking imagination and setting the theme for the entire room.
-
For the narrow, awkward wall: Many nurseries have that one small, narrow strip of wall that feels impossible to decorate. Instead of trying to squeeze in one medium-sized print, try a vertical stack of three A4 prints. This clever trick draws the eye upwards, creating an illusion of height and turning an awkward space into a thoughtful design feature.
-
For the space above the cot: The wall above the cot is prime real estate for nursery art. An A2 poster is often the perfect choice here. Its width usually complements the standard size of a cot bed beautifully, hitting that sweet spot of the two-thirds rule.
By thinking about the wall's shape and purpose, you can choose sizes that don't just fit, but actually enhance the room’s proportions.
Thinking About Viewing Distance
How far away you'll be when you look at the art really matters, too. A poster with lots of lovely, intricate details needs to be placed where you can get up close and appreciate it, while a bold, graphic print can make a statement from across the room.
Designer's Tip: Step back and think about the main viewpoints in the room. A poster you see from the doorway should have a different impact than one you’ll be looking at from the rocking chair right beside it.
To make things a little easier, we’ve put together a simple cheat sheet to help you match poster sizes to their ideal placement.
Poster Size and Room Placement Cheat Sheet
Here's a simple guide to help you match poster sizes to different spots in your child's room, keeping in mind how far away you'll typically be viewing them from.
| Poster Size | Ideal Viewing Distance | Best Placement in a Child's Room |
|---|---|---|
| A2 | 2–3 metres | As a stunning centrepiece above a cot or on a main feature wall. |
| A3 | 1–2 metres | In pairs above a dresser or as a key part of a gallery wall. |
| A4 | Up to 1 metre | Perfect for bookshelves, picture ledges, or smaller wall spaces. |
Of course, these are just guidelines. The most important rule is to choose what feels right for you and your family's space! By combining the two-thirds rule with a little thought about your walls and viewing spots, you can pick art that looks intentional, balanced, and beautiful.
And if you're thinking about the final look, our article on custom framed pictures can help you visualise how frames really complete the artwork.
Creating a Dreamy Gallery Wall
A gallery wall is a beautiful way to tell your family's story and display art that you love. But if you’ve ever stood in front of a blank wall with a stack of frames, you know that daunting feeling of where to even begin. The good news? Creating a stunning gallery wall is much simpler than it looks, and it all starts with a little bit of planning.
Transforming a wall into a personal art display is a fantastic way to add character to a nursery or child's bedroom. It’s an opportunity to mix treasured family photos with beautiful illustrations, creating a space that feels uniquely yours. With a few simple layout ideas and tricks, you can arrange your chosen UK poster sizes with confidence.
Finding Your Gallery Wall Style
Before you even think about picking up a hammer, take a moment to imagine the feeling you want to create. Are you drawn to a look that’s neat and symmetrical, or one that’s more playful and eclectic? There are two popular approaches that work wonderfully in children's spaces.
-
The Classic Grid: This layout is perfect if you're after a calm, organised feel. It involves arranging frames of the same size in a perfect square or rectangle. A grid of four A3 prints above a changing table, for example, creates a clean, cohesive look that’s incredibly pleasing to the eye.
-
The Organic Cluster: For a more relaxed and whimsical vibe, the organic cluster is your friend. This style is all about mixing different sizes and orientations. It’s perfect for growing with your child, as you can easily add new pieces over time without disrupting the entire layout.
It's in the organic cluster where mixing different UK poster sizes truly shines. This is how you build a dynamic and visually interesting display that tells a much richer story.
The Secret to Mixing Poster Sizes
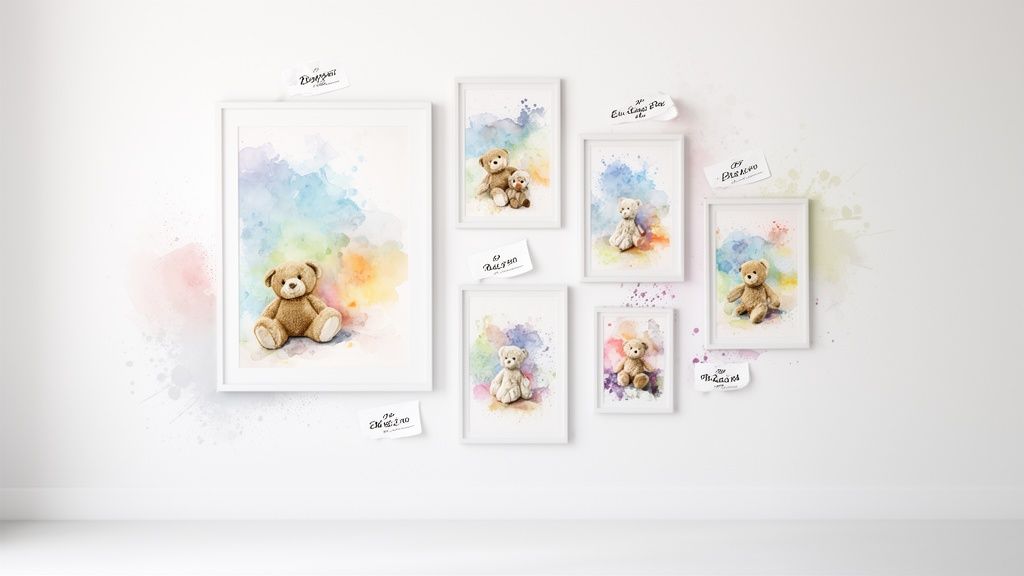
The key to a beautiful organic gallery wall is to start with an 'anchor' piece. This is your largest print, the star of the show that all the other frames will gravitate towards. An A2 print makes a fantastic choice for an anchor; its size gives it enough presence to ground the entire collection.
Once your anchor is in place, you can start arranging smaller prints around it. A popular combination is one A2 print, two A3 prints, and a couple of smaller A4 or A5 prints. This mix creates a lovely visual rhythm and stops the wall from feeling flat or one-dimensional.
A great rule of thumb is to keep the spacing between each frame consistent. Aim for about 2–3 inches (5–7.5 cm) between each piece. This gap is just enough to let each print breathe while making sure the whole collection feels connected.
Planning Your Layout The Stress-Free Way
Here’s a simple, foolproof trick to plan your gallery wall without making a single unnecessary hole in the wall. All you need is some paper (old wrapping paper is perfect), scissors, and a bit of tape.
- Trace and Cut: Lay each of your frames face down on the paper and trace around them. Then, simply cut out these paper templates.
- Arrange on the Wall: Using a low-tack tape (like painter's tape), stick your paper templates to the wall. This is your chance to play! Move them, rearrange them, and step back to see how it looks from different parts of the room.
- Mark and Hang: Once you’re happy with the arrangement, mark where the nail for each frame needs to go directly onto the paper template. Hammer the nail right through the paper, tear the paper away, and hang your picture. Easy as that!
This method takes all the guesswork out of the process, making it a fun activity rather than a stressful task. For more in-depth guidance, you can explore our step-by-step tutorial on how to create the perfect gallery wall for your home. By combining different sizes and planning your layout, you can create a dreamy, personal gallery that will grow with your family for years to come.
A Parent's Guide to Framing and Hanging Art Safely
You’ve found the perfect artwork and figured out the best UK poster sizes for your little one’s room, but don’t stop there! The final touches—framing and hanging—are just as crucial. A great frame doesn't just complete the look; it plays a huge role in keeping your child safe. This part of the process is all about mixing style with security to create a space that’s beautiful, personal, and safe.
When you're putting together a peaceful, secure space like a nursery, every little detail counts. Choosing a frame isn't just about matching your decor; it's a critical safety decision.
Choosing Child-Safe Frames
In a child's room, safety is always the number one priority. While traditional glass frames are common, they pose a real risk if they fall and shatter. Because of this, it's always best to go for child-safe alternatives.
Safety First: Always choose frames with shatterproof acrylic glazing (often called Perspex or styrene) instead of traditional glass for children's rooms. It has the same crystal-clear look but is lightweight and won't break into dangerous shards.
Here are a few other tips for picking the perfect, safe frame:
- Go Lightweight: Stick to frames made from light materials like natural pine, MDF, or polymer. Heavy, ornate frames are much more likely to cause damage or injury if they ever come loose.
- Keep the Style Simple: A simple, clean frame often works best with children's art. A natural wood finish adds warmth to a Scandi-themed room, while a sleek white or black frame can create a crisp, modern feel.
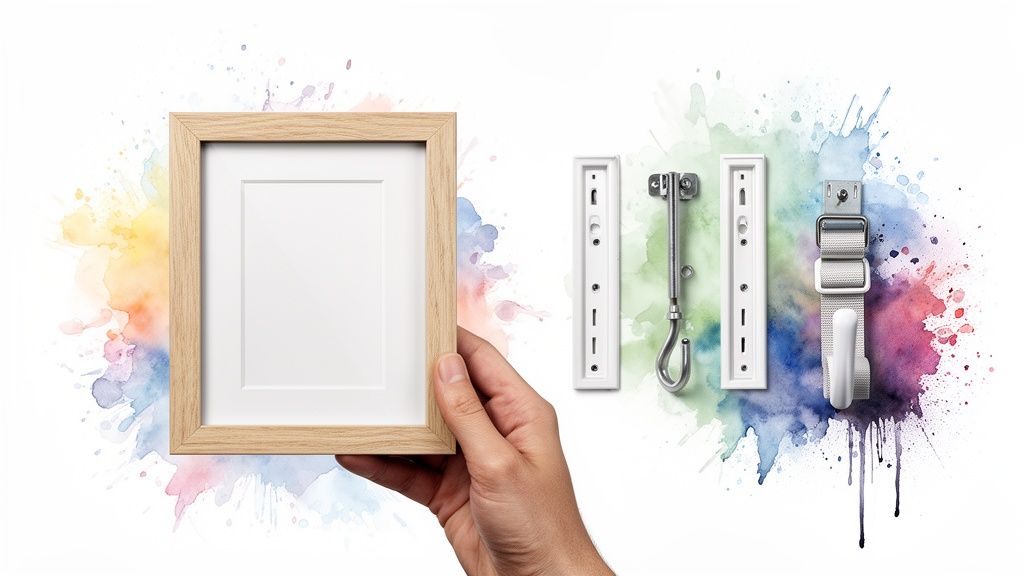
- Add a Professional Touch with a Mount: A mount (that’s the card border inside the frame) is a fantastic way to make your artwork pop. It creates a small gap between the print and the glazing, which stops any sticking and makes even a simple A4 print look much more substantial and professional.
Hanging Pictures Securely
Once you’ve got your safely framed art, the next step is getting it on the wall securely. The goal is to make sure it stays put, even with the occasional bump or knock from an adventurous toddler.
Start by picking the right hardware. For plasterboard walls, which are common in most UK homes, using a proper plasterboard plug with a screw gives you far more security than just a nail. For heavier pieces, it’s a good idea to use two fixing points for extra stability. If you're moving house or sending art as a gift, knowing how to protect it is key; check out these essential tips for fine art packing and shipping to ensure your pieces arrive in perfect condition.
Another thing to think about is height. It’s tempting to hang art at an adult's eye level, but in a child's room, it's often better to hang it a little lower where they can actually see and enjoy it. Just make sure to keep it well out of reach of curious little hands, especially if it’s above a cot or bed.
For more ideas on different hanging methods, including some great damage-free options, you can read our advice on how to hang pictures without damaging walls. By putting safety first with your framing and hanging choices, you can create a beautiful, inspiring space where your child can grow and dream, and you can have complete peace of mind.
A Closer Look at Print Quality: DPI and Bleed
Ever wondered what makes one print look beautifully sharp while another seems just a bit fuzzy? If you're using digital downloads or are simply curious about what happens behind the scenes, a couple of quick technical terms can make a world of difference. Don't worry, it's not complicated! Think of it as the secret recipe for getting that perfect piece of art for your child's room.
Let's demystify two of the most important terms in printing: DPI and Bleed. They're the key ingredients that ensure your posters and prints look professional and polished, every single time.
What is DPI and Why Does it Matter?
DPI simply stands for Dots Per Inch. The easiest way to picture it is to think about building an image with tiny Lego bricks. If you only use a few large bricks (dots) to fill an area, the final picture will look blocky and unclear. But if you pack that same area with lots and lots of tiny bricks, the image becomes incredibly sharp, detailed, and vibrant.
In the world of printing, these "bricks" are minuscule dots of ink. The more dots we can pack into every single inch of paper, the higher the quality of the image.
For a piece of art to look its absolute best when printed, it needs to have a high resolution. The industry gold standard is 300 DPI. This ensures every line is crisp and every colour is rich—perfect for capturing the delicate details in a watercolour animal or the bold lines of a superhero print.
Anything less than 300 DPI, especially for art that will be viewed up close in a nursery, can look blurry or "pixelated". This is why it's so important that your files are high-resolution from the start. For truly professional, crisp results, it's essential to understand concepts like DPI for printing.
Understanding Print Bleed
Now, let's talk about bleed. It might sound a bit strange, but it’s just a clever little trick printers use to make sure the colour goes flawlessly from one edge of the paper to the other.
Imagine you've given your child a colouring book. To make sure the colour fills the picture perfectly, you'd probably encourage them to colour slightly over the lines on purpose. That way, when you cut the picture out, there are no accidental white gaps left around the edges.
Print bleed works in exactly the same way. The artwork is actually designed with a small extra border—usually around 3 mm—that extends beyond the final trim size of the poster. The printer prints on a slightly larger sheet of paper and then trims it down to the correct size, cutting off that extra "bleed" area.
This process guarantees that your beautiful design extends perfectly to the very edge of the paper, creating a clean, professional finish with no distracting white borders. It’s a small detail that makes a massive difference in how your chosen UK poster sizes look in the end.
Common Questions About Nursery Poster Sizes
Choosing the right art for your little one's room can bring up a few last-minute questions. You've got your head around the A-series, gallery walls, and safe hanging, but sometimes you just need a quick, clear answer to make that final decision with confidence.
We get it! So, we've gathered some of the most common queries we hear from parents about UK poster sizes, with simple answers to help you create the perfect space. Think of this as your final checklist before bringing that beautiful nursery vision to life.
What Is the Best Poster Size for a UK Nursery?
This is the number one question parents ask, and honestly, it all depends on what you're trying to achieve.
For maximum versatility, the A3 poster (297 x 420 mm) is hands down the most popular and practical choice. It’s large enough to make a lovely statement on its own but is also the perfect size to anchor a small collection for a gallery wall.
If you have a bigger wall and want a single, stunning feature piece above a cot or changing table, an A2 poster (420 x 594 mm) is a fantastic option. And for smaller nooks, bookshelves, or for those adorable personalised name prints, the trusty A4 size is just right.
Can I Mix and Match Different Poster Sizes?
Yes, absolutely! In fact, we highly recommend it. Mixing up the sizes is the secret to creating a dynamic and visually interesting gallery wall that looks like it's been professionally curated. A varied display adds so much personality and stops the arrangement from feeling too rigid or flat.
A great strategy is to start with a larger 'hero' print, like an A2, and then arrange smaller A3 and A4 prints around it. The key to making it all look cohesive is to keep the spacing between frames consistent (around 2-3 inches is a good rule of thumb) and stick to a unified theme or colour palette.
Do I Need Special Frames for UK Poster Sizes?
Nope, and that's one of the best things about choosing standard A-series prints! Because A5, A4, A3, and A2 are the established UK poster sizes, you can easily find affordable and stylish frames in these exact dimensions from most home goods stores, supermarkets, and online retailers.
This little bit of convenience saves you the expense and hassle of ordering expensive custom frames, making it so much simpler to get your beautiful new art up on the wall.
Should I Get a Printed Poster or a Digital Download?
This really comes down to personal preference and how quickly you need the art.
- Printed Poster: This is the most convenient, hassle-free option. Your artwork arrives professionally printed on high-quality paper, ready for you to pop straight into a frame. No fuss, no extra jobs on your to-do list.
- Digital Download: This is a high-resolution file that lands in your inbox instantly. It’s a perfect choice if you're in a hurry to decorate or if you have a favourite local printer you'd like to support.
Both options give you a beautiful end result, so you can just choose whichever best suits your timeline and project.
Now that you have all the information you need, you’re ready to create a truly magical space for your little one. At Pompom Prints, we specialise in beautiful, timeless art that sparks imagination.
Explore our collections of nursery prints and find the perfect pieces for your home today!