

Putting together a gallery wall in your little one’s room is such a lovely way to bring together memories and art that can actually grow with them. It’s all about choosing a theme and colour palette that you love, picking out a nice mix of personal bits and beautiful prints, planning a layout that feels just right, and then hanging everything safely and securely. This guide is here to make the whole thing feel less like a chore and more like the simple, heartfelt project it should be.
Your Guide to a Heartfelt Nursery Gallery Wall
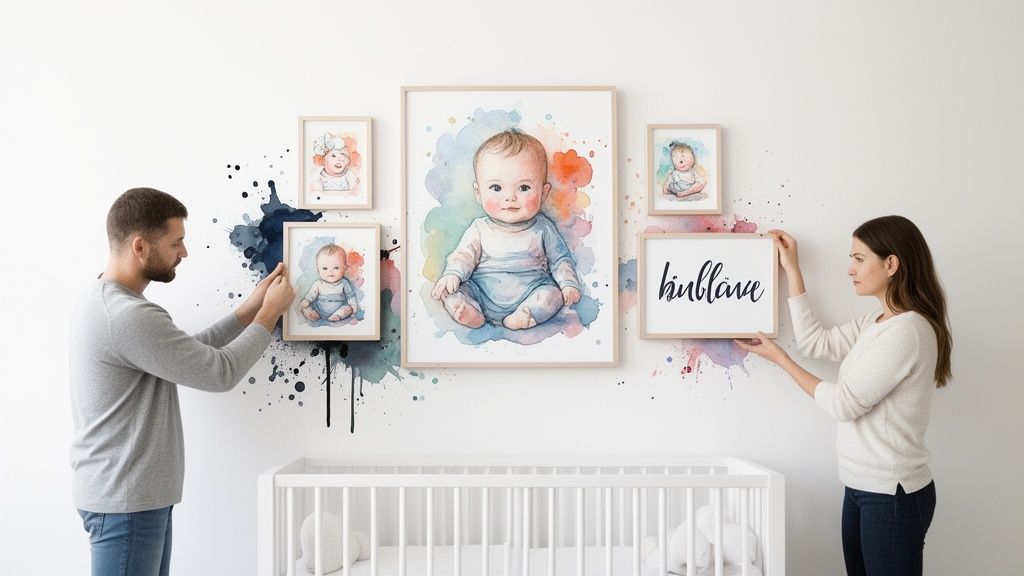
A gallery wall is so much more than just a bit of decoration; it’s like a visual storybook of your family’s love and all the dreams you have for your new arrival. It can turn a plain, boring wall into the real heart of the nursery, filling it with personality and warmth.
But for many new parents, the idea can feel a bit overwhelming, especially with everything else you’re getting ready for. Where do you even begin? What pieces should you pick? And how on earth do you make it all look cohesive without being a design expert?
Don't worry. This guide is designed to walk you through every step, turning what might feel daunting into something genuinely delightful. We’ll show you how to build a collection of prints and photos that feels deeply personal and looks beautifully put together.
Why a Gallery Wall Is Perfect for a Child's Room
A thoughtfully planned gallery wall is a fantastic way to personalise your child’s space. Unlike one massive piece of art, a collection of smaller prints can be swapped out and updated as your child gets older and their interests change. It's a truly adaptable feature that can evolve from serene newborn themes to vibrant toddler passions.
Here’s why it’s such a wonderful choice for parents:
- It Tells a Story: You can mix professional art prints with family photos, your child's first scribbles, or meaningful keepsakes like an ultrasound picture.
- It’s Adaptable: You don’t have to do it all at once. Start with a few key pieces and add more over time to celebrate milestones or new favourite things.
- It Adds Personality: Whether your style is calming Scandi, adventurous Jungle Safari, or sporty like our Superstar Football sets, a gallery wall really brings your chosen theme to life.
A gallery wall is a living scrapbook on display. It’s a space where you can celebrate your child's journey, from their bespoke name print announcing their arrival to the first finger painting they bring home from nursery.
Making It Uniquely Yours
The gallery walls that you’ll cherish the most are the ones that truly reflect your family. Think about bringing in items that hold special meaning. A print of the lyrics from a favourite lullaby, a map of a place that’s important to you, or a personalised name print can become the centrepiece that anchors the entire collection.
Our goal is to give you the confidence to create a display that feels authentic to you and your family. Throughout this guide, we'll share practical advice and inspiration from our experience helping thousands of parents. If you're looking for a little spark to get started, you can find plenty of great ideas for decorating a childs room to get your creativity flowing.
Now, let’s get to the fun part and start by choosing the perfect theme.
Finding a Theme That Grows with Your Child
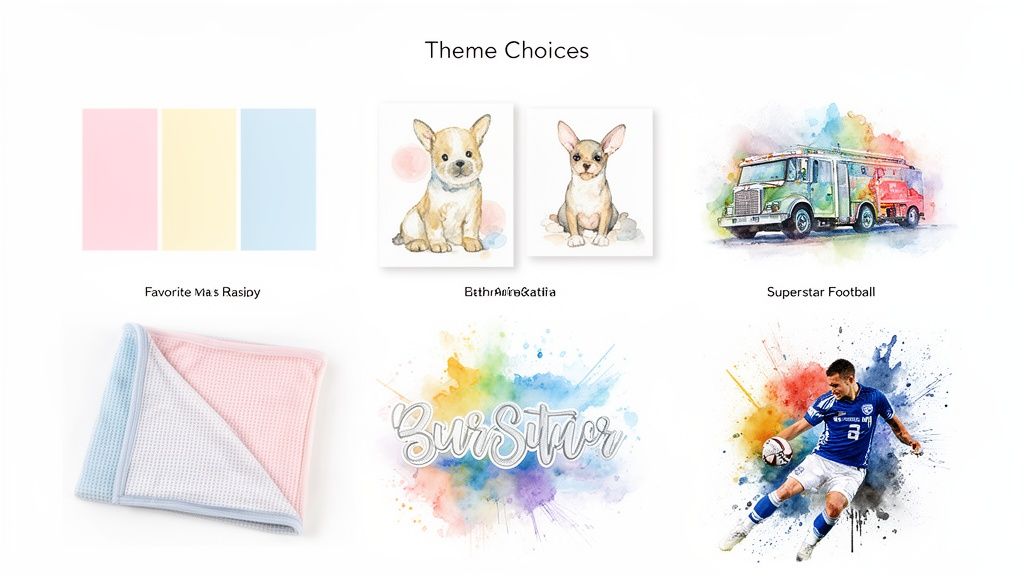
This is the fun part. Choosing a theme and a colour palette is where your nursery gallery wall really starts to come to life. Think of this as your North Star, the guide that will help you pick every piece of art and every frame to create a beautiful, cohesive display. The trick is finding a style you adore now, but that your little one will still love years down the road.
It's tempting to jump on the latest trend, but timeless themes that spark the imagination often have more staying power. Collections like our sweet Baby Animals or classic Watercolour Vehicles bring a gentle, charming feel that's just perfect for a nursery. Or, if you have a budding sports fan on your hands, our best-selling Superstar Football sets can bring a brilliant pop of energy and personality to their room. It's all about choosing a theme that feels personal to your family.
And you're not alone in wanting to create a special, personalised space. The UK wall art market was valued at USD 3.32 billion and is expected to climb to USD 6.57 billion by 2033, which just goes to show how much parents value making their children's rooms feel bespoke and beautiful.
Building Your Colour Palette
Don't feel like you need a degree in interior design to pull together a gorgeous colour scheme. Your inspiration can come from anywhere! It might be the soft grey of the cot you’ve picked out, the lovely pattern on their first blanket, or even just one beloved print that sets the tone for everything else.
A great rule of thumb for parents is to choose three to four main colours and then throw in a couple of accent shades to make things interesting. This simple formula gives you a framework to play with, but still leaves heaps of room for creativity.
For instance:
- For a serene, calm feeling: You could start with soft neutrals like beige and dove grey, bring in a muted sage green, and then use a warm ochre for that little pop of colour.
- For a more cheerful vibe: Try pairing a sunny yellow with a sky blue, grounding them with a crisp white, and adding splashes of bright coral for fun.
Don't be afraid to mix and match different prints. When you have a solid colour palette, it ties everything together and makes even an eclectic mix of art look intentional and thoughtfully curated.
Visualising Your Theme and Colours
Once you have a few ideas swirling around in your head, seeing them visually can be a game-changer. This is where creating a little mood board comes in handy. Learning how to create a moodboard for interior design is a brilliant way to gather all your inspiration in one place and really nail down your aesthetic before you start buying anything.
Many parents find themselves drawn to styles that feel calm and welcoming for any child. Soft pastels and earthy tones are fantastic for creating a soothing atmosphere that won’t feel dated in a few years. If that sounds like your vision, you might love our complete guide to creating beautiful and timeless gender-neutral nursery themes.
Curating Your Collection of Prints and Art
Now for the best bit! With your theme and colours locked in, it’s time to actually choose the beautiful artwork that will bring your gallery wall to life. A truly captivating display is so much more than a few matching frames; it's a thoughtful mix of different sizes, orientations, and personal treasures that tell your family’s story. The goal is a collection that feels curated, personal, and full of charm.
A great way for parents to get started is by picking a ‘hero’ print. This will be your largest, most eye-catching piece that anchors the whole arrangement. Think of it as the star of the show! A beautiful, large-scale animal portrait or a whimsical hot air balloon makes a stunning focal point. Once you’ve got your hero, you can start building around it with smaller, complementary prints that echo the main theme.
Achieving a Balanced Mix
To create that lovely, effortless look, you need to mix things up a bit. Don’t be afraid to combine different print orientations—placing a vertical (portrait) print next to a horizontal (landscape) one immediately adds a bit of energy and stops it from looking too rigid. This simple trick breaks up the monotony of a uniform grid and helps guide your eye across the wall.
Another layer of personality comes from including art that is uniquely yours. This is where a personalised name print can become the heart of the collection. Placing your child's name centrally makes it a clear focal point, while positioning it off-centre can create a more modern, asymmetrical feel. For a little more inspiration on this, our guide to using personalised nursery wall art is full of ideas.
The secret to a professional-looking gallery wall is variety. Mix sizes, orientations, and even textures. When every piece is different but connected by your theme and colour palette, the result is a display that feels collected over time, not bought in one go.
Simplifying with Curated Sets
If the thought of mixing and matching all these pieces feels a bit daunting, our curated print sets are a fantastic, stress-free solution for busy parents. At Pompom Prints, we’ve designed collections that take all the guesswork out of the process. Our sets are perfectly coordinated in terms of colour and style, making sure every piece works harmoniously together while still offering that varied, collected look. It’s an easy way to achieve a polished, cohesive gallery wall without any of the overwhelm.
We've put together a few ideas to show you how our different Pompom Prints collections can be combined for a balanced and visually interesting gallery wall.
How to Mix and Match Pompom Prints
| Print Combination Idea | Best For | Key Pompom Prints Pieces |
|---|---|---|
| The Classic Trio | A balanced, symmetrical look above a cot or changing table. | One A3 hero print (e.g., Safari Animal) flanked by two A4 prints (e.g., Rainbow and Quote). |
| The Asymmetrical Cluster | Creating a modern, dynamic feel in a corner or on a smaller wall. | Mix one A3, one A4, and two A5 prints. A personalised name print works beautifully here. |
| The Storytelling Line | A playful, linear arrangement that's great for above a long dresser. | Three or four A4 prints in a row, alternating between landscape and portrait orientations. |
| The Mini Collection | Perfect for tiny spaces or as a sweet accent to a larger feature wall. | A tight cluster of three A5 prints, perhaps combining a character, a letter, and a pattern. |
These are just starting points, of course. The most important thing is to choose pieces that you and your little one will love for years to come!
And remember, a gallery wall can be more than just framed prints. We’re seeing a growing love for more versatile wall decor. In the UK wall art market, things like wallpapers and stickers now represent 34.59% of revenue, showing just how much parents want customisable and creative solutions for their children's rooms. Mixing in a decal or a small wall hanging can add a wonderful layer of texture and fun to your display.
Planning Your Layout Before You Hang
Okay, before a single nail goes anywhere near that wall, let's talk about the most important part of creating a gallery wall you'll absolutely love: the layout. This is where you get to play curator, turning your collection of beautiful prints into a balanced, cohesive display. Trust me, spending a little time here saves a lot of headaches (and extra nail holes) later on.
The classic, can't-go-wrong method is using paper templates. It’s so simple. Just trace each of your frames onto some kraft paper or even leftover wrapping paper, cut them out, and use a bit of painter's tape to stick them on the wall. This lets you move things around, try different combinations, and step back to see what feels right. You can perfect the whole look without making a single permanent mark.
This planning stage is also where you really see how all your choices – the theme, the colours, the sizes – come together in your little one's room. It's a small step that makes a huge difference in making sure your gallery wall is one you'll adore for years.
Here's a simple flow that many parents find helpful when putting together their collection. It all starts with that one special print and builds out from there.

By choosing a hero print first, you create a focal point. Then, you can mix in different sizes for interest and add a personalised piece to make it truly yours.
Choosing Your Layout Style
The layout you choose can completely change the vibe of the room. Have a think about the size of your wall and how many prints you're working with. This will help you land on the perfect style for your little one’s space.
A few popular options to consider:
- Grid Layout: This style is very structured and symmetrical, with all frames being the same size and spaced evenly. It’s perfect if you're after a clean, modern look. It works brilliantly with a set from a single collection, like our Superstar Football series.
- Asymmetrical Balance: This is a more relaxed, organic approach. You get to mix different sizes, orientations (portrait and landscape), and even frame styles. The secret is to balance the visual ‘weight’. For instance, you could balance a large hero print on one side with a little cluster of smaller prints on the other.
- Linear or "Staircase" Layout: This is just the ticket for hallways or a wall along a staircase, where the prints follow the angle of the stairs. It also looks fantastic arranged in a line above a long piece of furniture, like a chest of drawers.
My Top Tip for Parents: Try to keep the spacing between your frames consistent, usually around 5-8cm (2-3 inches). It’s a tiny detail that makes a massive impact, giving your collection a polished, intentional feel instead of a cluttered one.
Go Digital with Your Design
If cutting and taping paper doesn't sound like your cup of tea, there are some brilliant digital tools that make planning even easier. We've partnered with the Pikso service at Pompom Prints, which lets you upload photos of your chosen art and arrange them on a picture of your actual wall. It’s a fantastic way to experiment and see exactly how your gallery wall will look before you commit.
And don't forget the frames! They play a huge part in the final look. For some ideas on how different finishes can pull your whole nursery décor together, have a look at our helpful article on how to choose the best picture frame colours.
To help you decide on the best way forward, here’s a quick comparison of the different layout techniques.
Comparing Gallery Wall Layout Techniques
Deciding how to plan your gallery wall layout can feel like a big choice, but it's really about what works best for you and your space. Each method has its own set of benefits.
| Layout Method | Pros | Cons | Best Suited For |
|---|---|---|---|
| Paper Templates | Tactile and visual. No screen time needed. Easy to adjust on the fly. Very low cost. | Can be time-consuming to trace and cut each frame. | Parents who prefer a hands-on approach and want to see the scale in the actual room. |
| Floor Layout | Quick to arrange and rearrange. Helps visualise spacing and balance easily. | Can be hard to translate perfectly from the floor to a vertical wall. Takes up a lot of floor space. | Parents who have all their frames ready and want to quickly experiment with different configurations. |
| Digital Tools (like Pikso) | See the final look on your actual wall. Easy to swap prints and experiment with zero effort. | Requires taking photos and uploading them. May have a learning curve for some apps. | Tech-savvy parents or anyone who wants a hyper-realistic preview before making any holes. |
No matter which method you pick, the goal is the same: to create a layout that feels balanced and brings you joy every time you walk into your child's room. Taking this extra step is what turns a group of pictures into a stunning, personal gallery wall.
Hanging Your Artwork Safely and Securely
With your layout perfected, it’s time for the final, most satisfying step: bringing your gallery wall to life. When you’re creating a space for a little one, safety isn't just a nice-to-have; it's the foundation of everything you do. This means choosing the right hardware and hanging each piece with care is non-negotiable.
Let's get that beautiful paper plan from the floor onto the wall. If you’ve used paper templates, this part is wonderfully simple. Just take a small nail and gently tap it through the paper exactly where the frame's hook will be. After you've marked all the spots, peel away the paper, and you’ll be left with perfectly placed little markers.
Choosing the Right Hardware for Your Walls
The type of wall you have dictates the best hardware for the job. Most modern UK homes have plasterboard (drywall), but if you’re in an older property, you might have solid plaster walls, which are much harder. It's always a good idea to do a quick check before you start drilling.
For lightweight frames (under 5kg) on plasterboard, a simple picture hook and nail will usually do the trick. For anything heavier, or just for extra peace of mind, it’s always better to use a wall plug (also called an anchor) with a screw. This gives you a much stronger, more reliable hold.
Here’s a quick rundown:
- Plasterboard: Use standard picture hooks for light items. For heavier frames, a self-drilling wall plug and a screw is your best bet.
- Plaster: You'll want to pre-drill a hole and use a wall plug designed specifically for plaster. These are made to grip the more brittle material without causing cracks.
- Brick or Masonry: This requires a bit more muscle. You’ll need a masonry drill bit and a sturdy wall plug designed for solid walls.
For a really comprehensive guide on the art of hanging, including precise measurements and levelling, check out these brilliant tips on how to hang pictures perfectly.
Child-Proofing Your Gallery Wall
In a child’s room, every last detail needs to be looked at through a safety lens. We want to make absolutely sure no frame can be accidentally knocked off the wall by a curious toddler or a stray flying toy.
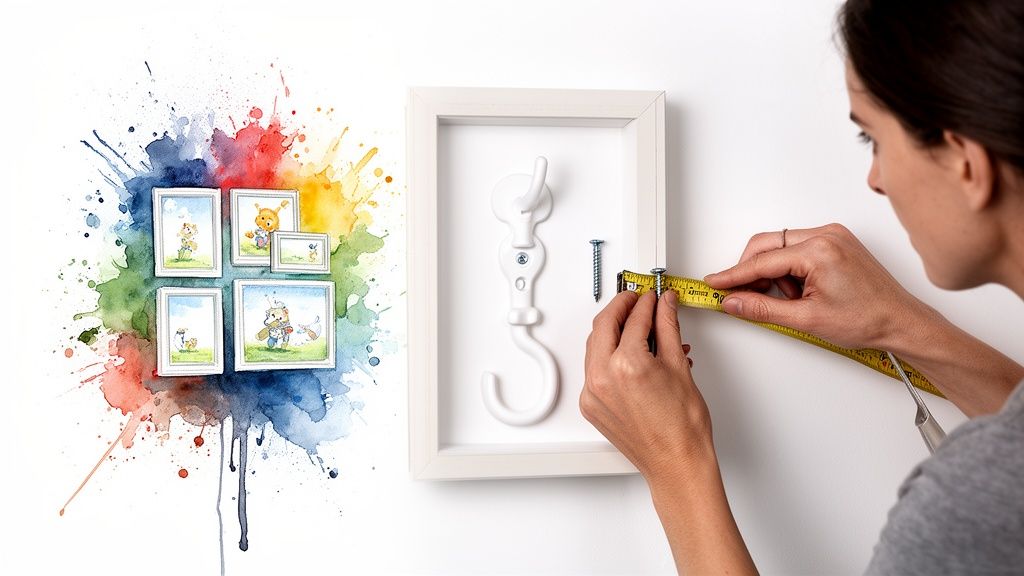
Standard picture hooks can be dislodged far too easily. Instead, I’d really recommend opting for more secure methods. Screw-in hooks that close fully, or security hangers (the kind they use in hotels and galleries), are fantastic options. They essentially lock the frame onto the wall, making it almost impossible for little hands to remove.
A great rule of thumb for hanging height is to aim for the centre of your entire gallery wall collection to be at eye level. That’s roughly 57-60 inches (145-152cm) from the floor. This creates a professional, balanced look that just feels right in the room.
Getting the Placement Just Right
Once you’ve marked your spots and chosen your hardware, the final step is hanging each piece. Your spirit level is your absolute best friend here! Use it to ensure every single frame is perfectly straight.
If your frames have D-rings and a wire, measure the distance from the top of the frame to the ring when the wire is pulled taut – that's where your nail or screw needs to go. For simpler sawtooth hangers, just centre the hanger on your wall mark.
By taking these extra little precautions, you’re not just creating a gallery wall; you’re building a safe, secure, and beautiful feature for your child’s room. For more inspiration on kid-friendly decorations, have a look at our thoughts on beautiful wall hangings for kids rooms that add wonderful texture and charm.
Your Gallery Wall Questions, Answered
As you start dreaming up a beautiful gallery wall for your little one, it’s only natural to have a few questions. To help you feel completely confident, here are some quick, practical answers to the things parents ask most when planning a safe and stunning space for their child.
Framed, Printed, or Digital? What’s the Difference?
Choosing how you want your art delivered really comes down to your budget, how quickly you need it, and how hands-on you want to be. There’s no right or wrong answer, just what works best for your family.
- Ready-to-Hang Framed Prints: This is the simplest, most stress-free option for busy parents. Our framed prints arrive completely ready to go on the wall, saving you the time and hassle of finding and fitting frames yourself.
- Flexible Printed Art: Already have the perfect frames in mind to match your nursery décor? Ordering our unframed prints gives you the total freedom to choose a specific colour or style that ties everything together.
- Instant Digital Downloads: This is the fastest and most budget-friendly route. You can print them at a local shop or even at home, which is brilliant for last-minute nursery projects or for our lovely customers outside the UK.
How Can I Make a Personalised Print Stand Out?
A personalised name print is such a special, sentimental piece, so it absolutely deserves to be the star of the show. The best way to do this is by making it the ‘anchor’ of your gallery wall.
Simply place it in the centre of your arrangement and then build your other prints around it. I love seeing a beautiful name print surrounded by adorable characters from our Baby Animals or Jungle Safari collections. This little trick naturally draws the eye right to your child's name, making the entire display feel so much more personal and complete.
How Do I Update the Wall as My Child Grows?
One of the best things about a gallery wall is that it’s not meant to be static! It can—and should—evolve right alongside your child. As their little personality blossoms and their interests change, you can easily swap out a few prints to reflect their new passions.
Think of your gallery wall as a living, breathing part of your child's room. Replacing a few sweet nursery animals with dinosaurs, football heroes, or magical unicorns is such a simple way to keep their space feeling fresh and exciting, often using the very same frames.
An even more heartwarming idea is to leave a few spots open for your child's own masterpieces. Mixing in their finger paintings or first scribbles turns the wall into a beautiful, ever-changing scrapbook of their creativity.
Should It Go Above the Cot or a Dresser?
When it comes to planning where your gallery wall will live, safety is always, always the top priority for parents. For this reason, we strongly recommend hanging your collection of frames above a dresser or changing table, rather than directly over the cot.
This simple placement choice completely removes any risk of a frame accidentally falling into their sleeping space. Plus, from a design perspective, an arrangement of art above a solid piece of furniture creates a stunning focal point that really anchors the room and brings the whole look together.
Ready to create a beautiful space that tells your child's story? Explore the full collection of prints and curated sets at Pompom Prints. https://pompomprints.com