

Hello, parents! There’s something truly special about creating a space for your little one that feels personal, magical, and completely their own. While furniture and paint colours set the stage, it's the art on the walls that really brings a room to life. Custom framed pictures are the perfect way to add that unique touch.
This is about more than just filling a blank space on the wall—it’s about curating a gallery of love, imagination, and memories that tells your family's story and grows with your child.
Transform Your Child's Room into a Personal Sanctuary

Designing a nursery or a child's bedroom is an act of love. You carefully pick out the cot, agonise over the colour palette, and find the softest rug. But the real character of the room comes from the personal details you hang on the walls. This is where custom framed pictures really shine, letting you go beyond generic decor to create something truly one-of-a-kind.
Instead of a simple poster, just imagine framing your child's very first scribbled masterpiece and turning it into a cherished piece of abstract art. Or maybe you want to display a whimsical animal print that matches their favourite bedtime story, perfectly mounted to complement the room's theme.
Why Custom Framing Matters for a Child's Space
The difference between a standard off-the-shelf frame and a custom one is a bit like a ready-made suit versus a tailored one; the fit and finish make all the difference. Going custom ensures every little detail is just right for your little one's special space.
A thoughtfully chosen frame does more than just hold a picture. It elevates the art inside, protects precious memories, and pulls the piece into your home's decor so it feels intentional and beautifully curated.
This personal touch is so important when you're creating a room that needs to feel both comforting and inspiring. If you need some ideas on what prints to choose, you can explore our guide to beautiful nursery wall art.
With custom framed pictures, you have the power to:
- Preserve Precious Memories: Protect your child’s first drawings, birth announcements, or special family photos from fading and damage, turning them into lasting keepsakes you'll treasure forever.
- Create a Cohesive Theme: Match frames and mounts to your nursery's colour scheme, whether you're going for a calm Scandinavian style or a vibrant jungle safari.
- Reflect Your Child's Personality: As they grow, you can frame art that shows off their changing interests—from dinosaurs and fairies to their favourite superheroes, making their room a true reflection of them.
In this guide, we'll walk you through everything you need to know. We want to demystify the framing process so you can confidently design a space that you and your child will adore for years to come. Let's get started turning those walls into a beautiful story.
What’s All the Fuss About Custom Framing?
The phrase ‘custom framing’ can sound a bit posh, but really, it’s a simple and wonderful idea. Think of it like getting a bespoke outfit made for your child's favourite print. Instead of trying to squeeze a special picture into a standard, off-the-shelf frame, custom framed pictures are built around your art, giving it a perfect fit that makes it truly shine.
This personal approach means every little detail is considered, creating a finished piece that feels intentional and beautifully put together. It’s the difference between a poster tacked to the wall and a cherished piece of decor that pulls the whole room together. You get to choose a classic white frame for a bright, airy nursery or a natural oak one to go with a whimsical woodland theme.
It’s no surprise this level of personalisation is booming. In the UK, the picture frame market is growing steadily, with a projected growth rate of 3.6% annually through to 2030. This is largely down to the huge demand for custom framed pictures in our homes, especially in nurseries and kids’ rooms, as more of us look to create unique, personal spaces for our families. You can dive deeper into this trend in this detailed market report.
From Simple Print to Polished Masterpiece
So, what actually goes into a custom frame? It's much more than just the wooden or metal border you see. The magic happens when three key parts work together to protect and show off your artwork. Once you know what they are, you'll see why this method looks so polished.
- The Frame: This is the main event! It provides the structure and style, setting the overall look and feel of the artwork.
- The Mount (or Mat): This is the card border sitting between the print and the frame. It’s not just for looks; it creates breathing space that draws your eye inward and stops the art from touching the glass.
- The Glazing: This is the protective front layer, usually glass or acrylic. It’s a bodyguard for your print, shielding it from dust, sticky fingers, and the UV light that causes fading over time.
When you go for custom framing, you get to hand-pick the perfect combination of all three. This makes sure the final piece doesn’t just fit your picture—it celebrates it.
A standard frame forces your art to fit its rules. A custom frame is built to honour your art's unique size and style, turning a simple picture into a treasured keepsake.
Why It Makes Such a Difference in a Child's Room
This tailored approach is especially powerful in a child's space. A bold, colourful dinosaur print might get lost in a fussy, ornate frame, but it will absolutely pop in a simple white one. In the same way, a delicate pencil drawing of a sleeping bunny feels much more special with a wide, soft-white mount to give it more presence on the wall.
This is the real magic of custom framed pictures. It’s not about finding a frame that "will do"; it's about creating a frame that makes the artwork come alive. It turns a favourite print, a family holiday photo, or even their own first finger-painting into a proper piece of art that looks like it was always meant to be there. This thoughtful process is how you create a room that feels cohesive, personal, and full of love.
Choosing the Perfect Frame and Mount for Your Nursery
Now for the really fun part—bringing your vision to life! The frame and mount you choose are like the finishing touches on a perfect outfit; they complete the artwork and can make all the difference in a child’s room.
Let's walk through the most popular options that parents love. We’ll look at how different materials and colours can complement various art styles and nursery themes, making sure the final piece feels like it was always meant to be there.
Finding the Perfect Frame Material
The frame itself sets the tone. It’s the first thing you see, and its style can completely change the feel of the artwork inside. For a nursery or playroom, you want something that’s both beautiful and durable enough for family life.
Here are the top choices for children's spaces:
- Classic White Frames: Clean, bright, and incredibly versatile. It’s no surprise white frames are a firm parent favourite. They create a light, airy feel that works with almost any decor, from modern Scandinavian to a colourful jungle theme. A simple white frame makes vibrant watercolours and bold graphics really pop.
- Natural Wood Frames: For a touch of warmth and texture, you can’t beat natural wood. Oak, pine, or ash frames bring a soft, organic feel to a room, which is perfect for woodland, rustic, or bohemian themes. They pair beautifully with gentle animal prints and nature-inspired art.
- Timeless Black Frames: Don't overlook the power of a classic black frame! It provides a striking contrast that makes colours appear more vivid and can add a touch of sophisticated fun to a gallery wall. It’s a bold choice that works wonderfully with monochrome prints or superhero-themed art.
Understanding the Role of the Mount
That crisp card border between the print and the frame is called a mount, and it’s a small detail with a huge impact. It’s much more than just a decorative element; it serves a crucial purpose.
A mount creates visual breathing room, stopping the artwork from feeling cramped and drawing your eye right to the image. It also protects your print by preventing it from touching the glazing. For smaller prints, a generous mount can make them feel much more substantial and important on the wall. A clean white or off-white mount is almost always a winning choice, adding a professional, gallery-quality finish to any piece.
The mount is the quiet hero of custom framing. It gives your artwork space to breathe and transforms a simple print into a beautifully presented piece of art.
Matching Frames to Your Nursery Theme
The beauty of custom framing is that you can perfectly match your art to your child’s room. Creating a cohesive look helps tie all your decor elements together, from the rug on the floor to the cushions on the chair.
Not sure where to start? Check out our helpful guide on how to choose the best picture frame colours for your space.
To give you some quick inspiration, we've put together a few ideas showing how you can pair frames and mounts with popular nursery themes to create a stunning, coordinated look.
Frame and Mount Pairing Ideas for Popular Nursery Themes
This table offers some quick style inspiration, pairing popular nursery themes with complementary frame and mount options to help you visualise the perfect look.
| Nursery Theme | Recommended Frame Style | Best Mount Colour | Why It Works |
|---|---|---|---|
| Jungle Safari | Natural Wood or Classic White | Crisp White | Natural wood complements the earthy, adventurous feel, while white makes the vibrant greens and animal colours pop. |
| Dreamy Florals | Classic White or Light Oak | Soft White | A white or light wood frame keeps the focus on the delicate artwork, creating a soft, serene, and timeless aesthetic. |
| Cool Superheroes | Bold Black or Simple White | Crisp White | Black adds a dramatic, graphic-novel feel, while a clean white frame provides sharp contrast to the bold primary colours. |
| Scandi Style | Light Oak or White | Bright White | This combination is the heart of Scandinavian design, creating a minimalist, warm, and uncluttered look that feels calm and cosy. |
Hopefully, these pairings give you a great starting point for styling your own custom framed pictures. The key is to choose a combination that not only fits your theme but also feels right for the special little room you're creating.
How to Create a Stunning Gallery Wall for Your Child
A gallery wall is a gorgeous way to tell a story and create a magical focal point in a nursery or playroom. It’s your chance to gather whimsical prints, precious family photos, and personalised name art into one beautiful display. But let's be honest, arranging multiple custom framed pictures can feel a bit daunting!
Don’t worry—getting that professionally curated look is much easier than you think. This little guide will walk you through designing a gallery wall that feels balanced, personal, and absolutely perfect, without any of the stress.
Plan Your Layout Before You Hang
If there's one golden rule for a perfect gallery wall, it's this: plan it out before a single nail touches the wall. This simple step is a complete game-changer, saving you from a patchwork of misplaced holes and guaranteeing you'll love the final arrangement.
A brilliant trick is to use paper cutouts. Just trace each of your frames onto craft paper, cut them out, and use a bit of painter's tape to arrange them on the wall. This lets you play around with the spacing and layout until it feels just right. You can even live with it for a day or two to be sure you’re happy before you commit.
Pro Tip: Try to keep the space between your frames consistent, usually around 2 to 3 inches. This creates a lovely sense of cohesion and stops the display from feeling either too crowded or too disconnected.
This simple diagram breaks the process down into three easy steps.
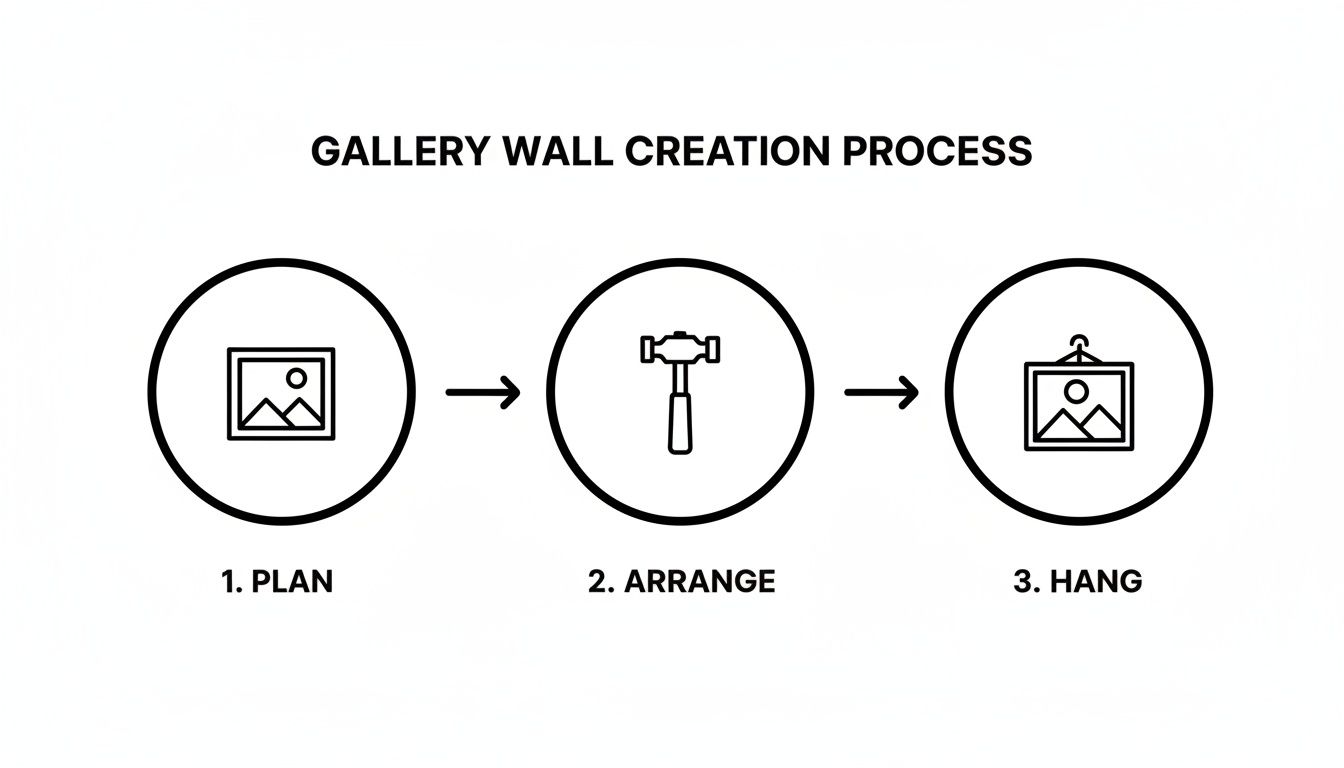
As you can see, a great gallery wall starts with a plan, then arranging your pieces on the floor, and only then moving to the wall itself.
Choose a Style That Tells a Story
Your gallery wall can be as neat and tidy or as fun and eclectic as you like. The style you choose really sets the mood for the entire room. There are two main approaches that work wonderfully in children's spaces.
- The Structured Grid: This is all about arranging frames of the same size in a neat grid. It creates a clean, modern, and organised look that feels very calm and intentional. A grid is perfect for showing off a series of matching prints, like a set of baby animals or colourful cars.
- The Organic Mix: A more playful and relaxed style, this involves mixing different frame sizes, shapes, and even orientations. It feels more dynamic and is ideal for telling a story with a variety of art, photos, and meaningful quotes. If you're looking for inspiration, you could even explore our guide on adding beautiful quotes on a wall to compliment your pictures.
Balance Your Collection for Visual Harmony
Once you’ve picked a style, the next step is to create a sense of balance. The key is to avoid clustering all the large or visually "heavy" pieces on one side.
A great way to start is by placing your largest frame first, usually slightly off-centre rather than smack bang in the middle. This encourages the eye to travel around the whole collection. Next, place your second-largest piece diagonally across from it. From there, you can start filling in the gaps with your smaller and medium-sized frames, mixing horizontal and vertical pictures to keep things interesting.
By spreading the visual weight evenly, you create an arrangement that feels effortlessly balanced and lovely to look at.
Choosing Between Digital, Print, or Fully Framed Art

When you're ready to bring a piece of art into your child's room, you've got more lovely choices than ever. You can go for a digital download for instant creativity, a beautiful print that’s ready for a frame you already own, or a completely finished piece that’s ready to hang. Each route has its own charm, so let’s walk through them to see what fits best with your family's needs, budget, and timeline.
The way we decorate our homes is always changing, and it’s wonderful to see how many parents are turning digital memories into physical keepsakes. This trend is a big part of the booming UK photo printing market, which is closely linked to custom framed pictures. In fact, the market is expected to jump from USD 866.16 million in 2024 to an impressive USD 2153.49 million by 2035. It's a clear sign of just how much we love getting our favourite images off our phones and onto our walls. You can discover more insights about this growing market if you're curious.
The DIY Dream: Digital Downloads
Think of a digital download as the creative starting block. Once you buy one, a high-resolution file of the artwork lands in your inbox almost instantly. This is a fantastic option for parents who love a good DIY project or are up against a deadline—like a last-minute baby shower gift!
The biggest plus here is flexibility. You can print the file at home or pop down to a local printer, giving you total control over the final size and the type of paper you want. It's a really budget-friendly way to get your hands on beautiful art, especially if you have some old frames you’d like to give a new lease of life.
The Best of Both Worlds: Unframed Prints
If you want the gorgeous quality of professional printing but don't want the faff of doing it yourself, an unframed print is the perfect middle ground. Your chosen artwork arrives as a physical, high-quality print, made using beautiful paper and vibrant, long-lasting inks. This saves you from having to find a reliable printer and guarantees the colours are just as the artist intended.
With a print in hand, you still get the freedom to choose your own frame later. It’s ideal if you’ve got your eye on a specific frame somewhere else or you just fancy browsing local shops for something unique. It really does strike the perfect balance between convenience and creative control.
Choosing between these options is about balancing time, budget, and your desire for a hands-on approach. Each path leads to a beautiful result—it just depends on the journey you want to take.
The Ultimate Convenience: Fully Framed Art
For busy parents, the fully framed option is the definition of hassle-free. Your chosen print is professionally mounted and framed before it even leaves the workshop, arriving at your door completely ready to hang. There’s absolutely no need to measure, mount, or assemble a thing.
This is the perfect choice for creating that polished, gallery-quality look with minimal effort. It ensures the frame, mount, and print are all perfectly matched and put together by experts, giving you a flawless finish. When you’re juggling a million things, having your custom framed pictures arrive ready for the wall is a true luxury. You can transform your child's room in minutes.
Caring For Your Artwork and Adding Final Touches
You’ve done it! You’ve picked the perfect art, created a gorgeous gallery wall, and now your beautiful custom framed pictures are up. The final step is making sure these pieces stay looking lovely for years, becoming a real part of your family’s story.
With just a few simple tricks for care and styling, you can protect your new art and tie the whole room together perfectly. It’s all about ensuring the art keeps bringing joy and personality to your child’s space as they grow, looking just as vibrant as the day you hung it.
Keeping Your Framed Pictures Pristine
Let’s be honest, children's rooms are full of life! That means a bit of dust and the odd sticky fingerprint are pretty much guaranteed. Keeping your frames clean is simple, but doing it the right way is key to avoiding any damage.
For the frame itself, whether it's wood or painted, a quick wipe with a soft, dry microfibre cloth is usually enough. For more stubborn marks, you can slightly dampen the cloth with a little water. Just never spray liquid directly onto the frame, as it can sneak behind the glass and damage the print inside.
When it’s time to clean the glazing (the acrylic or glass front), just follow these steps:
- Use the Right Cleaner: Steer clear of harsh chemicals like window cleaner, as they can ruin acrylic glazing. A much safer bet is a gentle mix of mild soap and water on a soft cloth.
- Apply to the Cloth: Always spray your cleaner onto the cloth first, never straight onto the surface. This gives you much more control.
- Wipe Gently: Use a light touch to wipe the surface, then follow up with a dry part of the cloth to buff away any streaks.
Protecting Artwork from Sunlight
Sunlight is probably the number one enemy of vibrant artwork. Those UV rays can cause the beautiful colours in your prints to fade and lose their punch over time.
To keep your custom framed pictures looking their best, try hanging them on a wall that isn’t in direct, harsh sunlight for hours on end. A wall that gets the gentle morning light (like an east-facing one) is a much better choice than a wall that gets blasted by the strong afternoon sun. It’s a small decision that makes a huge difference in the long run.
Think of your artwork like a treasured storybook. Keeping it out of direct sunlight prevents the colours from fading, ensuring the story remains bright and clear for your child to enjoy for years.
Adding the Final Styling Touches
With your art beautifully hung and protected, the last step is to connect it to the rest of the room's decor. This is the secret to creating a space that feels truly cohesive and pulled-together. Have a look at the main colours in your prints and try to repeat them elsewhere in the room.
For example, if your gallery wall has jungle prints with deep greens and sunny yellows, bring those shades into other little details. You could add a few green cushions to a chair, find a soft yellow rug, or even pick out bedding with a subtle pattern that picks up on those same tones. It creates a lovely sense of harmony and makes the whole room feel warm, intentional, and inviting.
Your Questions Answered
When you're choosing custom framed art for your little one's room, it's natural to have a few questions pop up. To help you feel completely happy with your choices, we’ve put together answers to some of the things we get asked most often by parents just like you.
What’s the Best Picture Size for a Nursery?
This really comes down to your wall space and the kind of look you're going for. If you want a single, beautiful statement piece above the cot, a larger size like A2 (42 x 59.4 cm) works wonders and creates a lovely focal point.
If you’re dreaming of a gallery wall, mixing different sizes like A3, A4, and A5 adds so much more personality and visual interest. A great little tip is to cut out paper templates to match the frame sizes and stick them on the wall before you order. It’s a simple step that helps you see how the scale feels in the room, making sure it’s just right.
Is It Safe to Hang Framed Pictures Above a Cot?
Safety is, of course, the number one priority in a nursery. Hanging art above the cot is a popular and beautiful look, but you absolutely must make sure the frames are hung securely. Always use hardware that’s right for your wall type, whether it’s plasterboard or brick.
Hang frames high enough that your little one can’t reach them, even when they start to pull themselves up in their cot. For extra peace of mind, lots of parents choose to create a gallery wall on a different wall altogether, or they opt for lightweight frames with shatterproof acrylic glazing instead of traditional glass.
How Do I Choose a Theme My Child Will Love for Years?
To give your artwork real staying power, it's a great idea to pick timeless themes and versatile colours. Gentle motifs like baby animals, charming Scandinavian designs, or classic nautical themes are lovely choices that tend to grow with a child.
A personalised name print is always a wonderful choice. It’s a keepsake that remains special long after they've outgrown toddling. Choosing a neutral frame, like natural wood or simple white, also means you can easily update the rest of the decor as your child's interests change over time.
Can I Mix Different Frame Colours on One Wall?
Absolutely! Mixing frame colours is a fantastic way to create a wonderfully personal and curated look. The trick is to keep one or two things consistent to tie it all together.
For example, you could mix natural wood and white frames for a cohesive Scandi feel that’s both warm and modern. Using the same style of art or a consistent colour palette across the prints will also help unite the different frames beautifully.
Ready to create a magical space for your little one? Explore the beautiful collections at Pompom Prints and find the perfect art to tell your family's story.