

Putting pictures up on a wall is one thing, but creating a beautiful arrangement is another. It all comes down to a bit of planning, choosing a theme that tells a story, and using the right tools to hang everything securely. When it’s for a child's room, this process becomes a magical way to create a personal space that truly reflects their budding personality.
Crafting a Magical Space for Your Little One
Welcome to the exciting world of decorating your child's room! Deciding how to arrange pictures on a wall is so much more than just filling an empty space. It’s about creating a personal, magical backdrop for your child's first years and beyond. You have a real opportunity here to tell a story, spark their imagination, and wrap them in a world filled with things they love.
This guide is for any parent who wants to create a beautiful gallery wall without all the stress. We’ll walk through everything together, from choosing a theme that grows with your child to that final, satisfying moment of hanging the last frame. Think of this as a chat with a fellow parent who’s been there, turning what can feel like a daunting task into a really rewarding project.
Why a Thoughtful Arrangement Matters
A well-planned gallery wall does more than just look pretty. It sets the tone for the entire room, turning a simple bedroom into a cosy den or a whimsical wonderland. For children, their room is their sanctuary—a place where they play, dream, and grow. The art you choose can become a real source of comfort and inspiration.
This focus on personalisation isn't just a fleeting idea; it's a huge trend among families. In fact, the UK wall art market hit a massive USD 3,597.2 million in revenue back in 2022, which just shows how much we all love personalising our homes, especially our children's rooms.
Creating a Wall That Tells a Story
The real magic of a gallery wall is its power to reflect your child's unique personality and your family's story. It's a chance to mix professional prints with treasured keepsakes.
Here are a few ideas to get you started:
- Mix in Personal Touches: Why not frame your baby's first footprint, a favourite family photo, or even a beautiful postcard from a grandparent?
- Choose a Timeless Theme: Themes like jungle safari, woodland animals, or celestial skies can grow with your child, staying relevant from infancy right through to their early school years.
- Plan for the Future: Think about how you can easily swap out prints as their interests evolve from dinosaurs to superheroes.
The goal is to create a display that feels collected and curated, not just decorated. It's a living part of their room that can change and adapt, just like they do.
Ultimately, arranging pictures is a labour of love. And if you're looking for inspiration beyond the walls, exploring some general kids room design ideas can help you pull the entire aesthetic of your child's space together, creating a room that is as unique as they are.
Designing Your Kid-Friendly Gallery Wall Layout
Before you even think about grabbing a hammer, let’s get to the fun part: dreaming up the design. This is where you get to be creative and map out the story you want the wall to tell, turning a blank space into a focal point that’s all about your child. The right layout can genuinely transform the entire feel of the room.
The trend for personal gallery walls has really taken off in UK homes, especially since the pandemic. It's no wonder Europe's wall decor market is projected to grow by an incredible USD 16.42 billion between 2025 and 2029, with the UK right at the forefront. When it comes to arranging pictures, 2022 stats showed that UK parents lean towards durable framed prints for kids' rooms, a market segment that saw a 20-25% growth.
A little bit of planning at this stage is your secret weapon for a stress-free hanging day. Let’s explore how to get your layout just right.
Choosing a Theme That Lasts
A good theme is the glue that holds your gallery wall together. For a child's room, the sweet spot is something that feels magical right now but won't feel dated in a year's time. This is why timeless themes are always a beautiful—and safe—bet.
Think about motifs that have a classic appeal:
- Jungle Safari: Gentle lions, elephants, and monkeys in soft watercolours can create an atmosphere that's both playful and soothing.
- Woodland Friends: Little foxes, bears, and bunnies bring a lovely, calm touch of nature indoors.
- Scandi Simplicity: Clean lines, muted colours, and minimalist animal designs offer a serene, stylish look that ages gracefully with them.
The goal is to pick a theme that can grow with your little one. A soft, whimsical style transitions beautifully from a newborn's nursery to a toddler's calming bedroom.
Popular Gallery Wall Layouts for Kids Rooms
Here’s a quick comparison of different arrangement styles to help you choose the best fit for your space and aesthetic.
| Layout Style | Best For | Key Tip |
|---|---|---|
| Symmetrical Grid | Creating a sense of calm and order, perfect for above a cot or bed. | Use frames of the same size and maintain equal spacing for a clean, polished look. |
| Asymmetrical Cluster | Adding energy and personality to a playroom or a large, empty wall. | Start with the largest print as your anchor and build smaller pieces around it. |
| Picture Ledge | A flexible option that allows for easy updates and adding objects like little toys. | Layer frames of different sizes and depths to create visual interest. |
An asymmetrical cluster, in particular, is brilliant for mixing and matching different bits and pieces. You could even include your child’s own masterpieces alongside professional prints. For more hands-on activities, explore some delightful ideas for creating a kid-friendly gallery.
Choosing the right layout really just comes down to the vibe you want for the room.
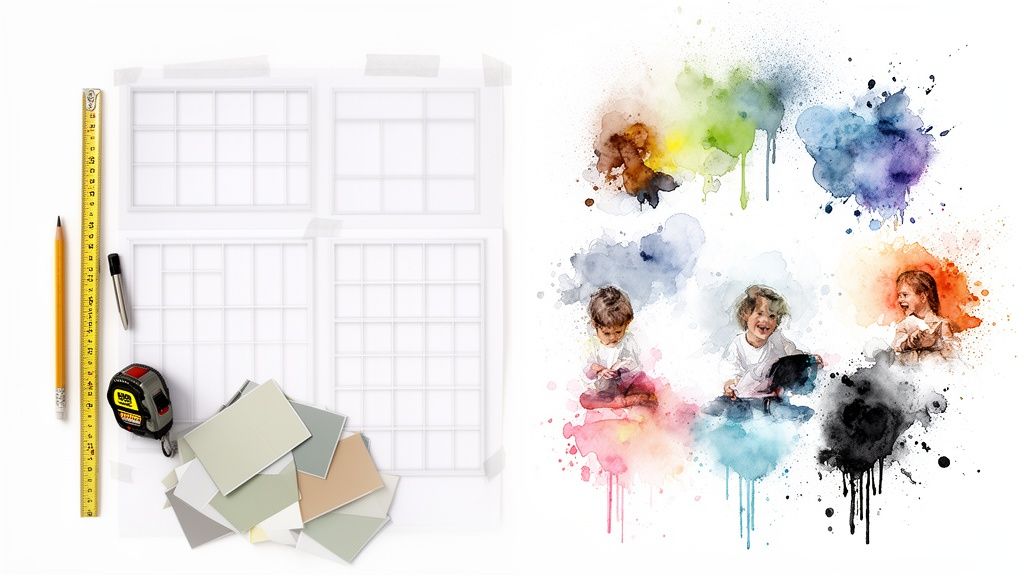
The Paper Template Trick
If I could give you just one piece of advice for arranging pictures, it would be this: map it out on the floor first, then create paper templates for the wall. Trust me, this simple step will save you from making countless unnecessary holes.
It's as easy as it sounds:
- Trace each frame onto Kraft paper or even some old wrapping paper, then cut them out.
- Play around with arranging these paper shapes on the floor until you find a layout you absolutely love.
- Use a bit of painter's tape to stick the paper cutouts onto the wall.
This lets you live with the layout for a day or two. You can see how it looks in the morning light versus the evening, and make tiny adjustments without any commitment. It's a total game-changer for picturing the final result and making sure everything feels perfectly balanced.
Parent Tip: Take a photo of your paper layout on the wall with your phone. Sometimes, seeing it in a picture gives you a fresh perspective and helps you spot any awkward gaps you might have missed.
Once you’re completely happy with the arrangement, you’ll know exactly where each nail or hook needs to go. This planning phase is your blueprint for a gallery wall that looks intentional, professional, and full of heart.
Getting Your Measurements and Spacing Just Right
So, you've got a layout in mind. Now for the bit that makes a gallery wall look truly professional. A little bit of measuring here saves a lot of guesswork later, ensuring those beautiful prints hang exactly where they should. It’s what turns a random collection of frames into a polished, intentional feature in your child's room.
You’ve probably heard the classic rule: hang art at "eye level." But what does that really mean? In galleries and most homes, this translates to the centre of the artwork being 57 inches (around 145 cm) from the floor. It’s a comfortable viewing height for the average adult.
A child's room, however, is the perfect place to bend the rules. You have the freedom to adapt this guideline to fit the space and, most importantly, your little one.
Adapting Eye Level for a Kid's Room
While the 57-inch rule is a great starting point, the furniture in your child’s room will ultimately guide your decision. You wouldn't hang art at the same height in a reading corner as you would above a tall chest of drawers.
Think about these common scenarios in a nursery or bedroom:
- Above a Cot or Bed: Safety is everything here. The bottom of the lowest frame needs to be high enough that a curious toddler can't reach it, even when standing in their cot. A gap of 8-10 inches above the cot rail is a safe bet.
- Above a Changing Table or Dresser: You can go a bit closer here. Aim for the bottom of your frames to be 6-8 inches above the furniture. This visually connects the art to the piece below it, making them feel like a single, cohesive unit.
- In a Play Area: This is your chance to bring the art down to their level! Hanging a few sturdy, securely fixed pieces lower on the wall makes the art feel more accessible and engaging for your child.
Here’s a little tip I swear by: once you've taped up your paper templates, take a photo on your phone. Looking at the arrangement on a small screen often gives you a much better sense of scale and balance than just staring at the wall.
The Secret to Perfect Spacing
Consistency is what makes a gallery wall look calm and collected rather than chaotic. Keeping an even gap between all your frames is probably the most important "rule" of them all.
For most gallery walls, a gap of 2-3 inches (5-8 cm) between each frame is the sweet spot. It gives each print enough room to breathe while keeping the whole arrangement feeling connected. Trying to eyeball this is surprisingly tricky, so using a tape measure or even a small piece of wood cut to size as a spacer is a brilliant hack.
This precise approach is something UK parents are increasingly getting right. The residential sector is driving the demand for wall art as part of a home decor market that's projected to hit USD 25.72 billion by 2026. For arranging tips backed by numbers, surveys suggest that applying design principles like the 'rule of thirds'—placing key prints slightly off-centre—can boost the perceived visual harmony by 40%. Perfect for creating those beautifully cohesive walls!
Balancing Your Arrangement
Once you have your height and spacing sorted, the final piece of the puzzle is balance. An unbalanced gallery wall can make an entire room feel a bit "off."
It all comes down to visual weight. A large, dark-coloured frame will feel heavier than a small, light one. Your goal is to distribute this weight evenly across the arrangement.
Here are a few simple ways to achieve that balance:
- Anchor with the Largest Piece: Start by placing your largest print slightly off-centre. This will become the anchor for your entire display.
- Work Outwards: Arrange your medium and smaller pieces around it, always maintaining that consistent 2-3 inch gap.
- Mix Orientations: Try balancing a large horizontal (landscape) piece with a couple of smaller vertical (portrait) pieces next to it.
For more helpful visuals and ideas on pulling different elements together, have a look at our guide to stylish childrens wall decor. Following these simple measurement and spacing guidelines will give you the confidence to create a display that feels perfectly placed and beautifully balanced.
Hanging Pictures Safely in a Child's Room
Now for the moment of truth: bringing your carefully planned design to life on the wall. When you're arranging pictures in a child's room, safety isn't just a consideration; it's the absolute top priority. This is where we shift from design daydreaming to practical reality, making sure every single frame is secure, sturdy, and safely out of reach of curious little hands.
Let's walk through the best ways to get your art up on the wall, looking at the pros and cons of each for a kid-friendly space. From traditional hooks that offer maximum security to damage-free options perfect for lighter prints, you'll finish this section ready to hang your art with total confidence.
Choosing Your Hanging Method
The hardware you choose really depends on two things: the weight of your frames and the type of wall you have (plasterboard or solid brick, for example). In a child's room, this decision is even more critical, as you're balancing security with the desire to avoid unnecessary wall damage.
Here’s a quick breakdown of the most common options:
- Traditional Picture Hooks: These are the classic choice for a reason. A simple nail-in hook is incredibly secure for most lightweight to medium-weight frames and is my go-to for anything hanging above a cot or changing table. The small hole they leave is easily filled later on.
- Adhesive Strips: These are fantastic for lightweight, unframed prints and a brilliant choice if you're renting or simply hate the idea of making holes. Always check the weight limit on the packaging—and then double-check it. For these to work properly, the wall surface has to be clean, dry, and smooth.
- Picture Wire and D-Rings: For heavier or larger pieces, using two D-rings on the back of the frame with picture wire strung between them offers a very secure hold, especially when hung on two hooks. This method also makes it much easier to get the picture perfectly level.
My personal tip for parents is to use a bit of a hybrid approach. For any artwork hung in a high-traffic area or above the cot, I always recommend the peace of mind that comes with a traditional picture hook. For smaller, lighter prints in less critical spots, adhesive strips can be a great, low-commitment option.
The Great Debate: Glass vs Perspex
When it comes to the frames themselves, what's covering the print is a huge safety factor. While glass offers that premium, crystal-clear finish, it poses a significant risk in a child's room.
Perspex (or acrylic glazing) is the undisputed champion for nurseries and playrooms. It’s lightweight and completely shatterproof, meaning there’s no danger of sharp shards if a frame were to accidentally fall. Modern perspex offers excellent clarity and even UV protection, so you really aren't compromising on quality. Always opt for perspex for any frames within a child’s reach or above their bed.
A Step-by-Step Guide to Hanging Your Pictures
Once you've sorted your hardware and frames, it's time to get hanging. This visual guide is a brilliant reminder of the core principles we covered earlier, helping ensure your arrangement looks polished and professional.
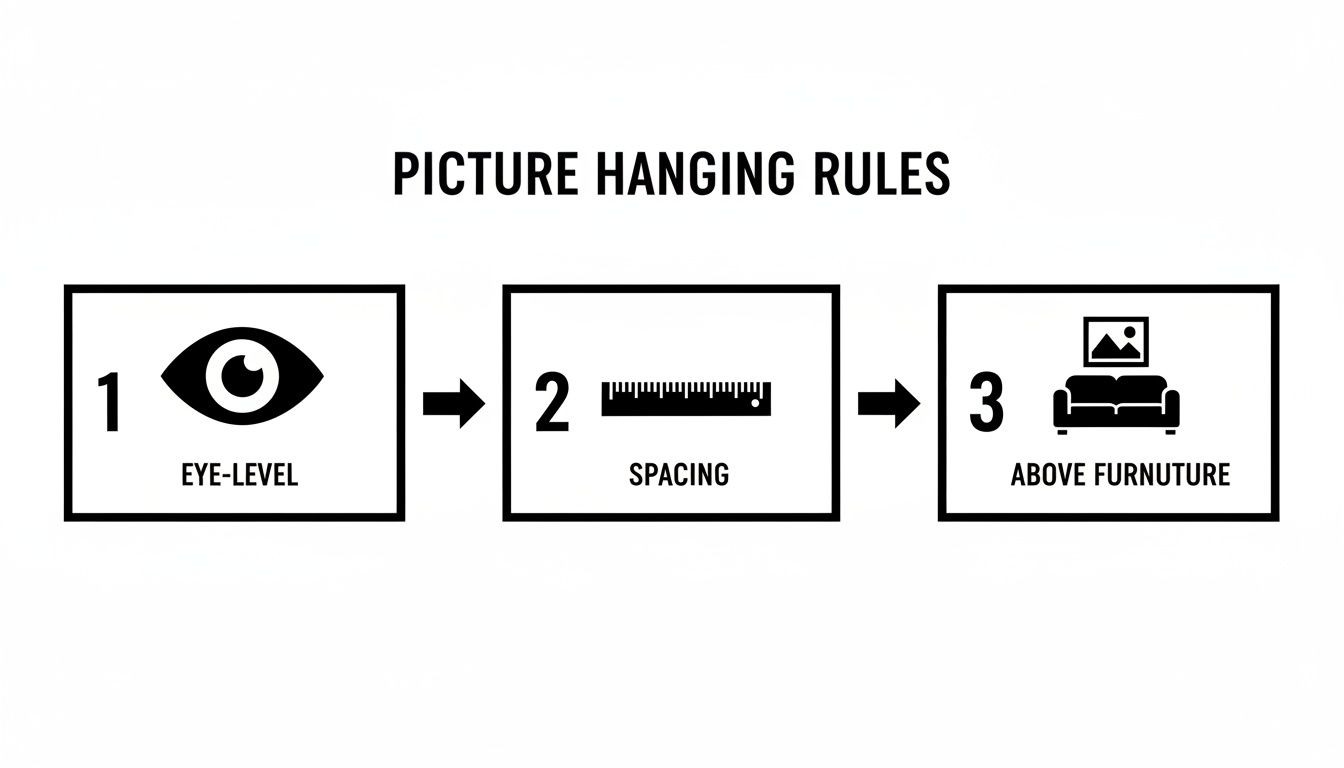
This little cheat sheet highlights the three golden rules of placement: hanging at a comfortable eye level, keeping the spacing consistent, and correctly positioning art above furniture to create a cohesive look.
Here's how to put it all into practice:
- Mark Your Spot: With your paper templates still taped to the wall, figure out the exact spot where the nail or hook needs to go. For a standard picture hook, this is easy. For picture wire, you'll need to pull the wire taut towards the top of the frame and measure the distance from the top of the wire to the top of the frame's edge.
- Make Your Mark: Transfer this measurement to the wall, marking the spot lightly with a pencil.
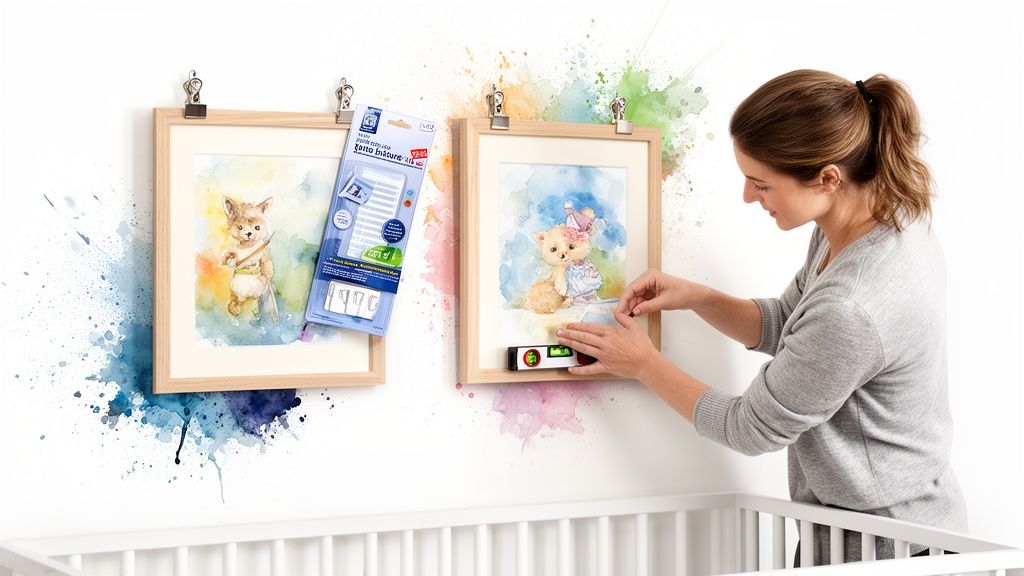
- Install the Hardware: Gently hammer in your nail or picture hook at a slight downward angle—this gives it extra strength. If you're using a rawlplug for a heavier piece, drill a hole, pop the plug in, and then screw in your hook.
- Hang and Level: Place your picture on the hook. Now, grab a spirit level (or just use a level app on your phone) and place it on top of the frame. Gently adjust it until that bubble is perfectly centred.
For those who want to avoid holes altogether, there are some excellent damage-free options out there. To help you decide, you can find more information in our guide on how to hang pictures without damaging walls. Taking that extra minute to get each piece perfectly level is what elevates a good gallery wall to a great one.
Adding Personality to Your Child's Art Collection
This is the fun part. Once you've got the technical bits sorted, it's time to infuse the wall with genuine personality. The final touches are what turn a simple collection of pictures into a meaningful feature, making it a true reflection of your family and a source of joy for years.
A beautiful gallery wall tells a story. By weaving in personal items, you create a display that feels like a warm, loving part of your home and is completely, uniquely yours.
Mix in Meaningful Memories
Art doesn't have to come from a shop. In fact, some of the most treasured pieces on your child's wall will be the ones that money can't buy. This is your chance to celebrate your family's journey and your little one's budding creative spirit.
Think about including treasures like:
- Their First Masterpiece: That very first crayon scribble or finger painting is pure gold. Pop it in a simple frame, and it instantly becomes a priceless piece of modern art.
- Keepsakes and Mementos: A beautiful postcard from a grandparent, a ticket stub from a memorable family outing, or a favourite photo adds lovely layers of personal history.
- Ultrasound Scans: Framing a tiny scan picture is such a sweet, subtle nod to where their whole story began.
Anything can be art if it means something special to you. A pressed flower from a walk in the park, a drawing on a napkin—these are the personal touches that give a gallery wall its heart and soul.
Mixing these items with professional prints creates a rich, textured display that tells a story. If you're looking for beautiful, cohesive ways to present these memories, exploring options for custom framed pictures can bring it all together perfectly.
Play with Frames and Textures
While a uniform set of frames can look incredibly chic, don't be afraid to mix things up! Playing with different frame styles is a brilliant way to add depth and a curated, collected-over-time feel. As long as you stick within your chosen colour palette, the result will be dynamic and interesting.
Consider combining different styles:
- Vary the Material: Mix sleek, modern black frames with the warmth of natural wood or even a pop of metallic gold for a bit of sparkle.
- Experiment with Shapes: You don't have to stick to rectangles. An oval frame or even an embroidery hoop can break up the grid and add a lovely, soft touch.
- Go Beyond the Frame: Not everything needs to be framed! A small woven wall hanging, a painted wooden letter, or a delicate garland can add wonderful texture and dimension.
This eclectic approach stops the arrangement from feeling too rigid or like it's straight out of a catalogue. It's how you build a collection that feels truly authentic.
Design a Wall That Grows with Them
One of the best things about a gallery wall in a child’s room is that it can be a living, evolving display. Their interests will change at lightning speed, and their wall art can change right along with them.
If you plan for this from the beginning, updates become easy and fun.
- Easy-to-Swap Frames: Look for frames with simple backings that make it easy to switch out the artwork without taking the whole thing off the wall.
- Create a "Masterpiece of the Month" Spot: Dedicate one specific frame for your child's latest drawing. This makes them feel incredibly proud and involved in their own room's decor.
- Embrace the Journey: As their passion shifts from baby animals to dinosaurs, and then from dinosaurs to space explorers, you can refresh the gallery to reflect who they are right now.
This thoughtful approach ensures the display remains relevant and cherished. It becomes more than just decoration; it’s a beautiful, visual timeline of their childhood, capturing fleeting moments and passions one frame at a time.
Your Picture Hanging Questions Answered
Even with the best plan in the world, a few last-minute questions always pop up when it comes to the final details. It’s totally normal to want everything to be just right. Here are some straightforward answers to the questions we hear most from parents when they're figuring out how to arrange pictures in their little one's room.
How High Should I Hang Pictures in a Nursery?
The classic interior design advice is to hang art with its centre at 57 inches from the floor, which is the average eye level for an adult. But a child’s room is the perfect place to bend that rule a bit! Context is everything here.
If you’re hanging prints above a piece of furniture, like a chest of drawers or a changing table, a great rule of thumb is to position the bottom of the lowest frame about 6-8 inches above the surface. This creates a nice visual link between the art and the furniture, making them feel like they belong together.
In a playroom, you can definitely hang some pieces a little lower so your child can see and enjoy them up close. The most important rule, though, is always safety. Any art hung above a cot or bed must be well out of a toddler’s reach, making sure nothing can ever be pulled down.
What's the Best Way to Arrange Pictures of Different Sizes?
Mixing up the sizes is what gives a gallery wall that lovely, dynamic feel so many of us are after. It adds bags of personality and stops the whole arrangement from looking too rigid or formal.
I always suggest starting with your largest print and treating it as the 'anchor' for the whole display. Try placing it slightly off-centre to create a natural focal point. From there, you can start building out with your smaller and medium-sized prints around it.
A handy trick for getting the balance right is to place two smaller, vertical frames next to a larger horizontal one. It creates a really pleasing sense of visual weight. Just remember to keep a consistent gap of 2-3 inches between all your frames for a clean, polished look.
Laying it all out with paper templates first is the absolute best way to get it perfect before you make a single mark on the wall.
Should I Use Nails or Adhesive Strips in a Kid's Room?
This is the big debate, isn't it? The best choice really comes down to what you value more: absolute security or convenience. For a child’s room, my advice always leans heavily towards safety and a secure fixing.
- Traditional Picture Hooks: These are your most secure option and the best choice for any frames hung above a cot, bed, or play area. The peace of mind is worth the tiny nail hole, which is super easy to fill in later on.
- Damage-Free Adhesive Strips: These can be fantastic, especially for renters or for very lightweight, unframed prints. They're brilliant for adding smaller decorative touches without any long-term commitment. But, you absolutely must check the weight limit on the packet and make sure your wall surface is clean and smooth for them to stick properly.
For ultimate security, I’d always recommend using traditional fixings for the main pieces of your gallery wall, especially anywhere your child might sleep or play. It just ensures your beautiful display is as safe as it is stylish.
At Pompom Prints, we believe creating a beautiful and safe space for your child should be a joyful experience. Explore our collection of unique, high-quality nursery and children's wall art to find the perfect pieces for your family's story. Visit us today at https://pompomprints.com.